 Save
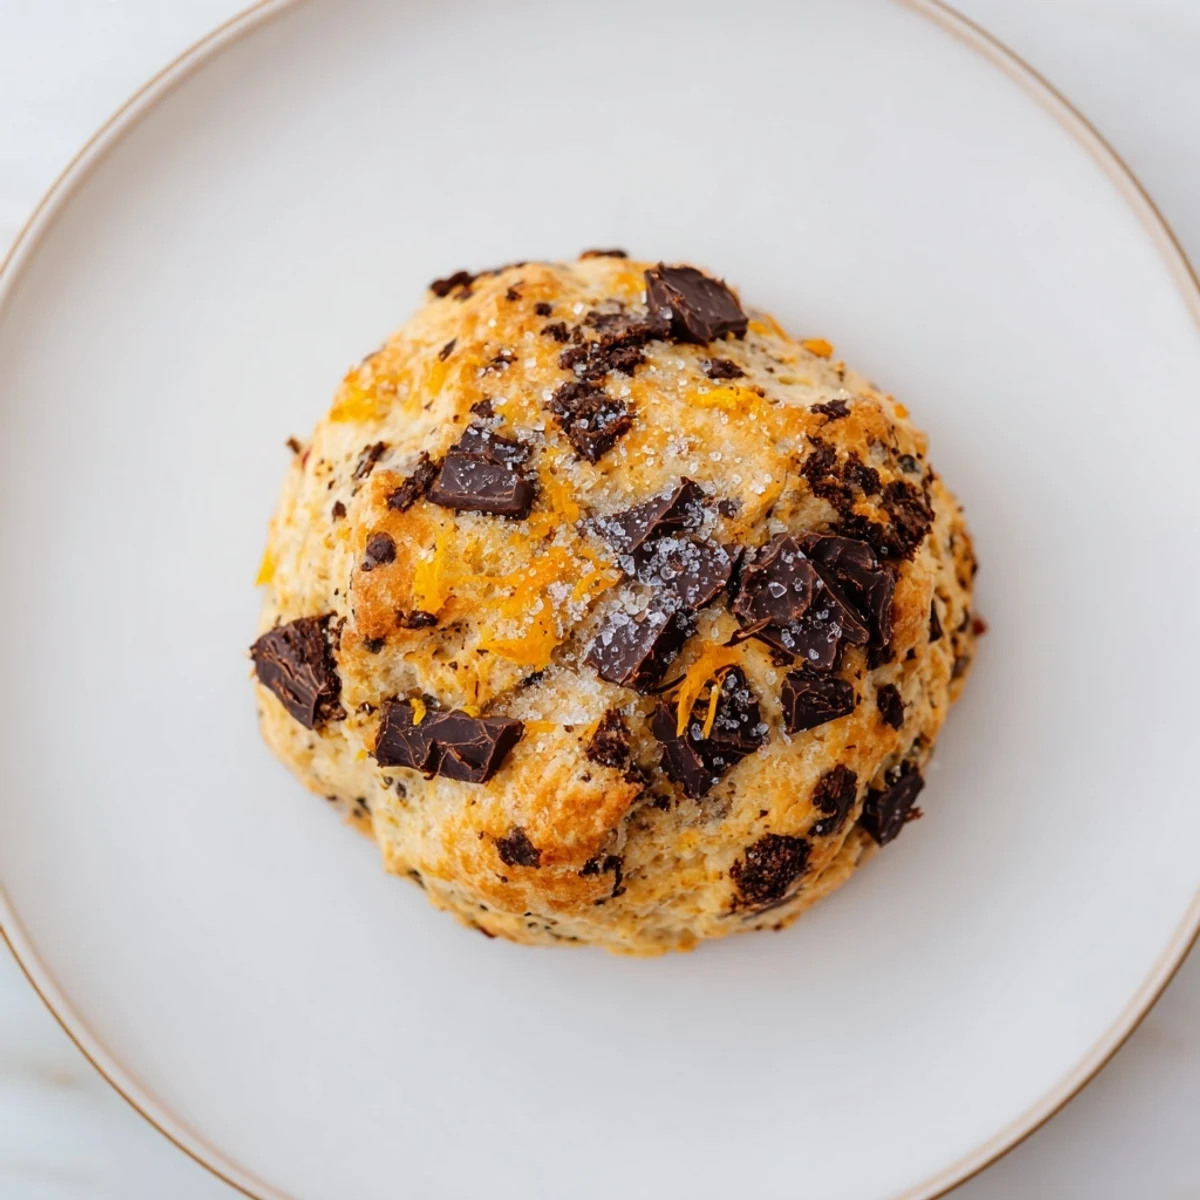
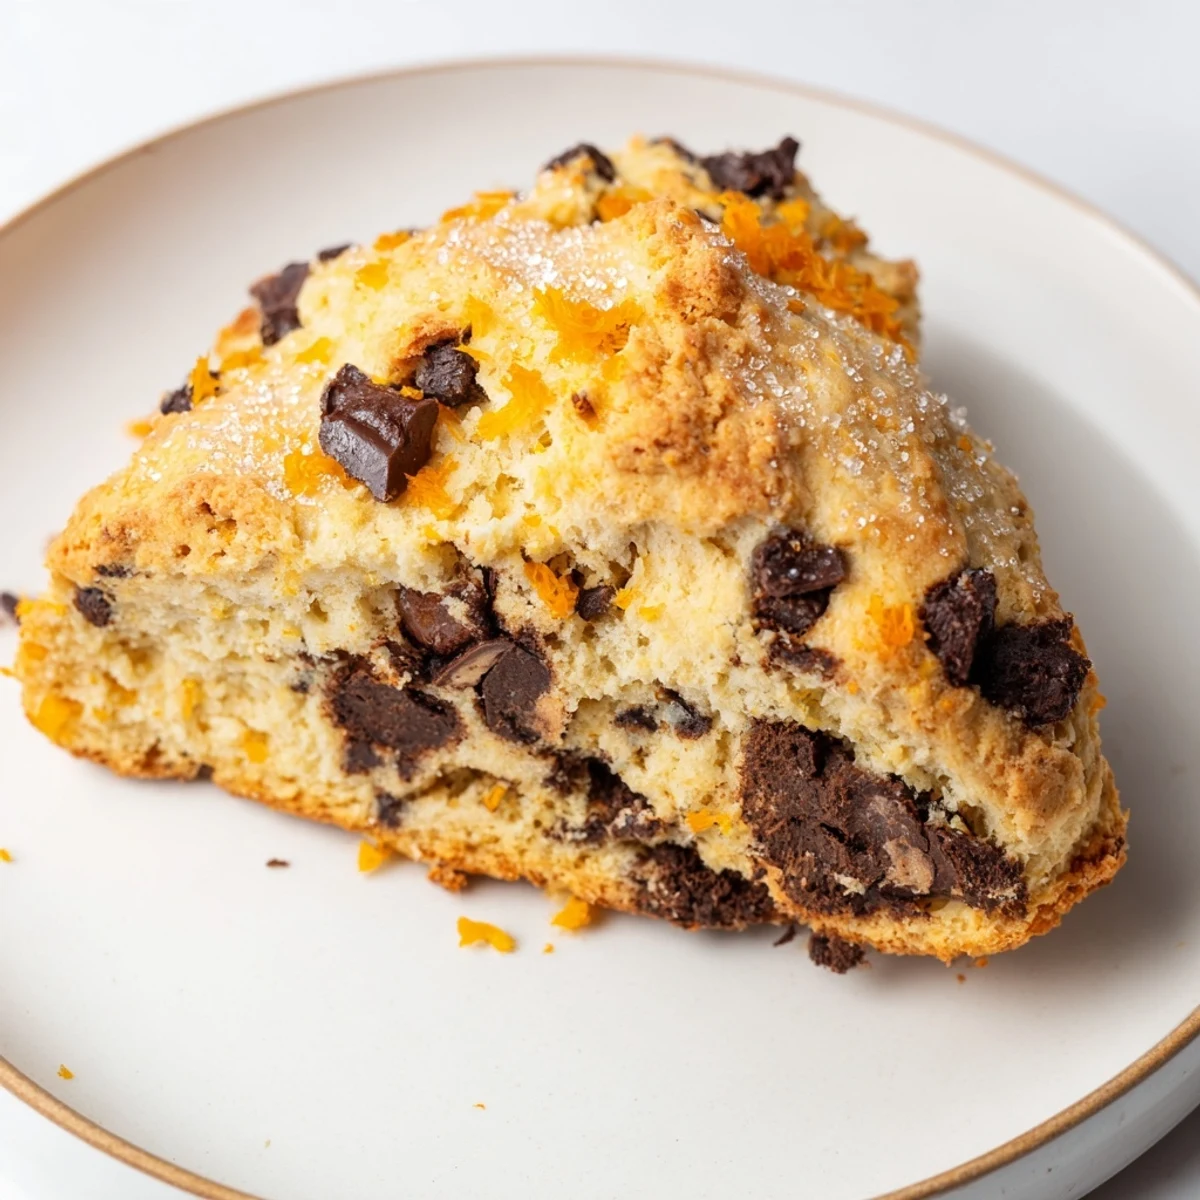
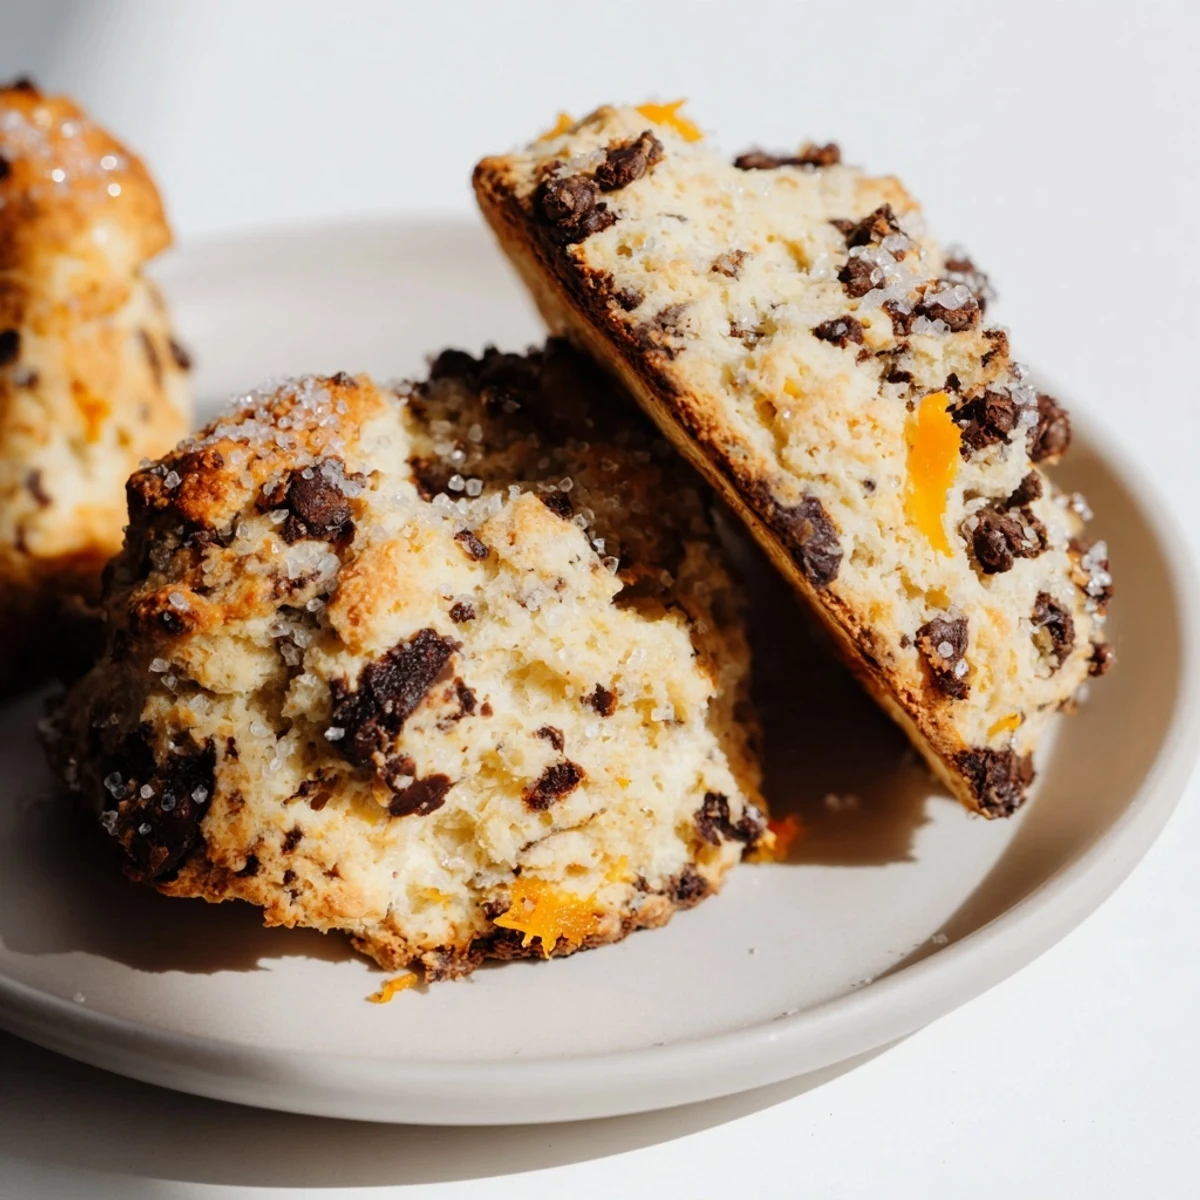
Save These scones combine the zesty brightness of fresh orange with pockets of dark chocolate for a rich, tender texture. The dough is gently mixed to maintain a light crumb, then brushed with cream and sprinkled with turbinado sugar for a crisp, golden crust. Perfectly baked to balance buttery richness and citrus notes, they make a delightful breakfast or afternoon treat best enjoyed warm. Variations allow milk or white chocolate swaps, while leftovers keep well in airtight containers.
I still remember the morning I first combined dark chocolate and orange in a scone. It was a rainy Tuesday in London, and I'd found myself in a small bakery tucked away on a quiet street. The baker handed me a warm scone wrapped in brown paper, and I bit into that perfect balance of citrus brightness cutting through rich, melting chocolate. I thought right then: I need to recreate this magic in my own kitchen. Years later, these scones have become my signature—the ones people ask me to bring to every gathering, the ones that somehow taste like both comfort and celebration at the same time.
My sister came to visit last spring, and I woke up early to have these waiting when she stumbled into the kitchen. She took one bite and just closed her eyes. We spent the whole morning talking with our mouths full, butter on our fingers, the kitchen smelling like candied orange peel and cocoa. Those scones became the thread that stitched that whole visit together—we made them three times while she was here.
Ingredients
- All-purpose flour (2 cups): This is your foundation—measure by spooning and leveling, not scooping straight from the bag, or you'll end up with dense, heavy scones
- Granulated sugar (1/3 cup): Just enough sweetness to let the orange and chocolate shine without making these taste like dessert
- Baking powder (1 tbsp): This is what gives scones their signature tender, slightly fluffy crumb—don't skip it or use old baking powder that's been sitting in your cabinet for three years
- Salt (1/2 tsp): This tiny amount is the secret that makes chocolate taste like chocolate and orange taste brighter
- Cold unsalted butter (1/2 cup): Cold is everything here—if your butter is soft, your scones will be greasy and flat instead of tender and tall
- Heavy cream (2/3 cup plus more for brushing): This creates a richness that makes these feel luxurious, but it also keeps them from drying out the next day
- Large egg (1): The binding agent that holds everything together while adding just enough richness
- Orange zest (from 1 large orange): Use a microplane grater and get right down to the fragrant yellow part—the white pith underneath is bitter and will ruin the balance
- Pure vanilla extract (1 tsp): This deepens all the flavors and adds a warmth that ties chocolate and orange together
- Dark chocolate (3/4 cup chopped, 60-70% cocoa): This percentage gives you chocolate flavor without bitterness—too dark and the scones taste almost savory, too light and they taste more like candy
- Turbinado sugar (optional topping): Those big crystals catch the light and add a gentle crunch that feels intentional and pretty
Instructions
- Set your stage:
- Heat your oven to 400°F and line a baking sheet with parchment paper. Cold ovens are the enemy of good scones, so give it those extra minutes to truly preheat—your kitchen should feel warm and ready when you're about to bake.
- Mix the dry base:
- In a large bowl, whisk together flour, sugar, baking powder, and salt. Whisk deliberately, like you're aerating the flour slightly and making sure the leavening is evenly distributed. You should hear the dry ingredients whisper together.
- Cut in the butter:
- Add your cold butter cubes to the dry mix and use a pastry cutter, or honestly, your fingertips work beautifully. Work quickly—the goal is pea-sized butter pieces suspended in flour. If you see any big chunks of butter, that's actually good; they'll create little pockets of steam that make your scones flaky. Don't overthink this part, and whatever you do, don't let the warmth of your hands melt the butter.
- Combine the wet ingredients:
- In a separate bowl, whisk together heavy cream, egg, orange zest, and vanilla. The zest will perfume the cream immediately, and you should smell citrus with every stir. This mixture is your magic liquid.
- Bring it together:
- Pour the wet ingredients into the dry mixture and stir gently with a wooden spoon until just combined. You'll feel the moment—suddenly the dry flour disappears and everything comes together into a shaggy dough. Stop here. Overmixing is the scone killer; it toughens the crumb and makes them dense like hockey pucks.
- Add the chocolate:
- Fold in the chopped dark chocolate gently, using just a few turns of your spoon. Some pieces should stand out in the dough—you want to see dark flecks throughout, not an even distribution.
- Shape with intention:
- Turn the dough onto a lightly floured surface and gently pat it into a disk about 1 inch thick. This shouldn't take much work; if you're wrestling with the dough, you're overworking it. Cut the disk into 8 wedges, like you're cutting a pie. Place them on your prepared baking sheet with a little space between each one—they need room to rise and get golden edges.
- The finishing touch:
- Brush the tops lightly with a little extra cream using a pastry brush or even your fingertip, then sprinkle with turbinado sugar if you have it. This creates a beautiful, crunchy top that catches the light.
- Bake until golden:
- Bake for 16-18 minutes. You're looking for golden-brown tops and a scone that springs back slightly when you touch the top. Overbake by even a few minutes and they start to dry out, so set a timer and stay close.
- Rest before serving:
- Let them cool on a wire rack for just a few minutes. They'll continue to cook slightly on the cooling pan, and eating them warm with butter melting into the steam is when they're absolutely perfect.
 Save
Save Last December, my neighbor knocked on my door with a desperate question: what could she bring to a holiday party that wasn't sweet? I handed her these scones still warm from the cooling rack, and she came back hours later almost in tears because someone had asked for her recipe. There's something about food that tastes homemade—real chocolate, fresh citrus, butter you can actually taste—that makes people feel seen and cared for in a way nothing else quite does.
Choosing Your Chocolate Wisely
The chocolate you choose is the difference between a good scone and one that people remember. I learned this the hard way when I grabbed whatever chocolate was on sale—it tasted waxy and one-dimensional. Then I invested in a good-quality 60-70% dark chocolate, and suddenly the scones had depth. The chocolate flavors were complex and almost sophisticated, playing beautifully against the bright orange. You don't need expensive artisan chocolate, but you do need chocolate that you'd actually want to eat on its own. Check the label and make sure cocoa butter is in there, not palm oil or mysterious stabilizers. Dark chocolate above 70% starts to taste too bitter and almost savory with the orange, while milk chocolate makes them taste more like dessert than breakfast. Find that sweet spot in between and you've got scones that taste intentional and special.
The Orange Factor—Making It Sing
Orange and chocolate want to be together; they genuinely do. But getting that balance right requires thinking beyond just adding zest. The zest is bright and aromatic, yes, but it can sometimes feel like a whisper if you're not intentional. Some bakers add a tiny bit of orange extract or even a squeeze of fresh orange juice to deepen that flavor, while others prefer the zest to stand alone. I've found that the quality of your orange matters tremendously—a thin-skinned, fragrant orange from a farmers market will taste completely different from a mealy supermarket one. When you're zesting, go slowly and deliberately, using just the yellow outer layer. The white pith underneath is bitter and will completely throw off the flavor balance. If you find yourself with bland citrus or if you're just someone who loves bold flavors, adding 1/2 teaspoon of orange extract is a game-changer—but start with less and taste as you go, because it's concentrated and can easily become overwhelming.
Storage, Serving, and Sharing
These scones are best enjoyed the day they're made, ideally warm with butter that melts into the crumb and maybe a dollop of orange marmalade or clotted cream. But real life happens, and sometimes you need to bake ahead. Leftover scones store beautifully in an airtight container for up to two days—at that point, they start to dry out or stale. If you want to make them further in advance, you can freeze the unbaked dough wedges on a baking sheet, then pop them straight into the oven from frozen, adding just a couple of extra minutes to the baking time. They'll taste like you just made them. For serving, warm them gently in a 300°F oven for about 5 minutes to revive that just-baked warmth and softness.
- Never brush the tops with melted butter instead of cream—butter will make them brown too quickly on the outside while staying raw inside
- If your orange zest clumps up in the cream, just whisk it through gently; those little bits will distribute as you fold the wet ingredients into the dry
- Make these on a day when you can serve them warm—the difference is literally the difference between good scones and unforgettable ones
 Save
Save These scones are more than just breakfast—they're an invitation to slow down and taste what's real. Serve them warm, share them generously, and let them be the reason people gather around your table.
Recipe FAQs
- → What is the best type of chocolate to use?
-
Dark chocolate with 60–70% cocoa provides a rich contrast to the bright orange zest, but milk or white chocolate can be used for a milder sweetness.
- → How do I ensure the scones are tender?
-
Cutting cold butter into the dry ingredients until coarse crumbs form and avoiding overmixing when adding wet ingredients preserves tenderness.
- → Can these scones be made ahead?
-
They are best enjoyed fresh but can be stored in an airtight container for up to 2 days and reheated gently before serving.
- → What purpose does the turbinado sugar serve?
-
Sprinkling turbinado sugar on top before baking adds a delicate crunch and touch of sweetness to the golden crust.
- → Is there a way to boost the orange flavor?
-
Adding ½ teaspoon of orange extract intensifies the citrus notes without altering the scone's texture.