 Save
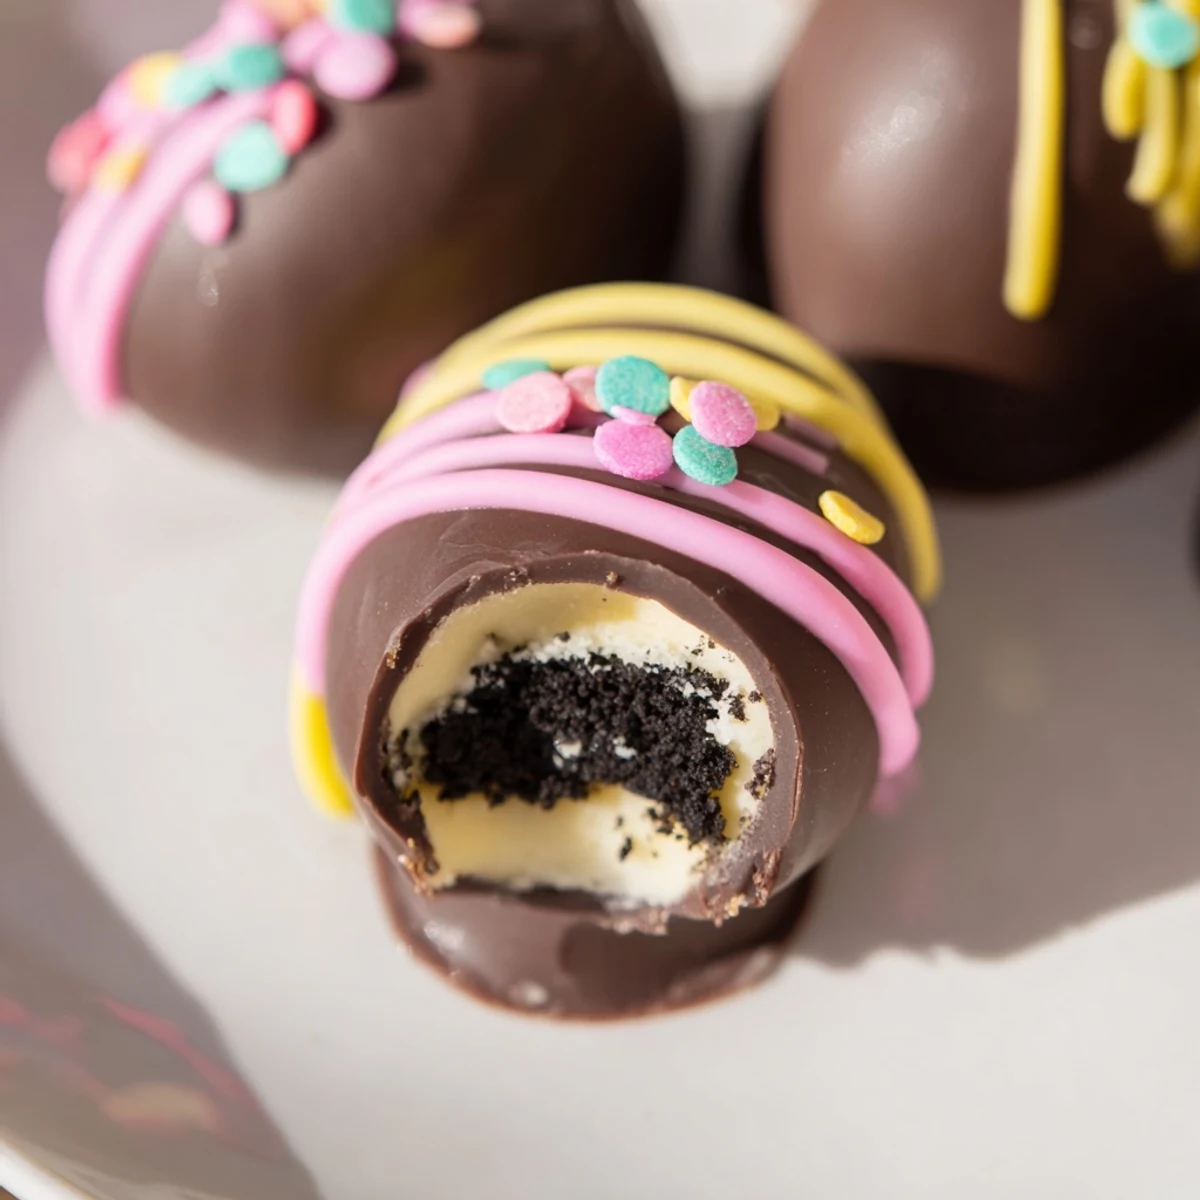
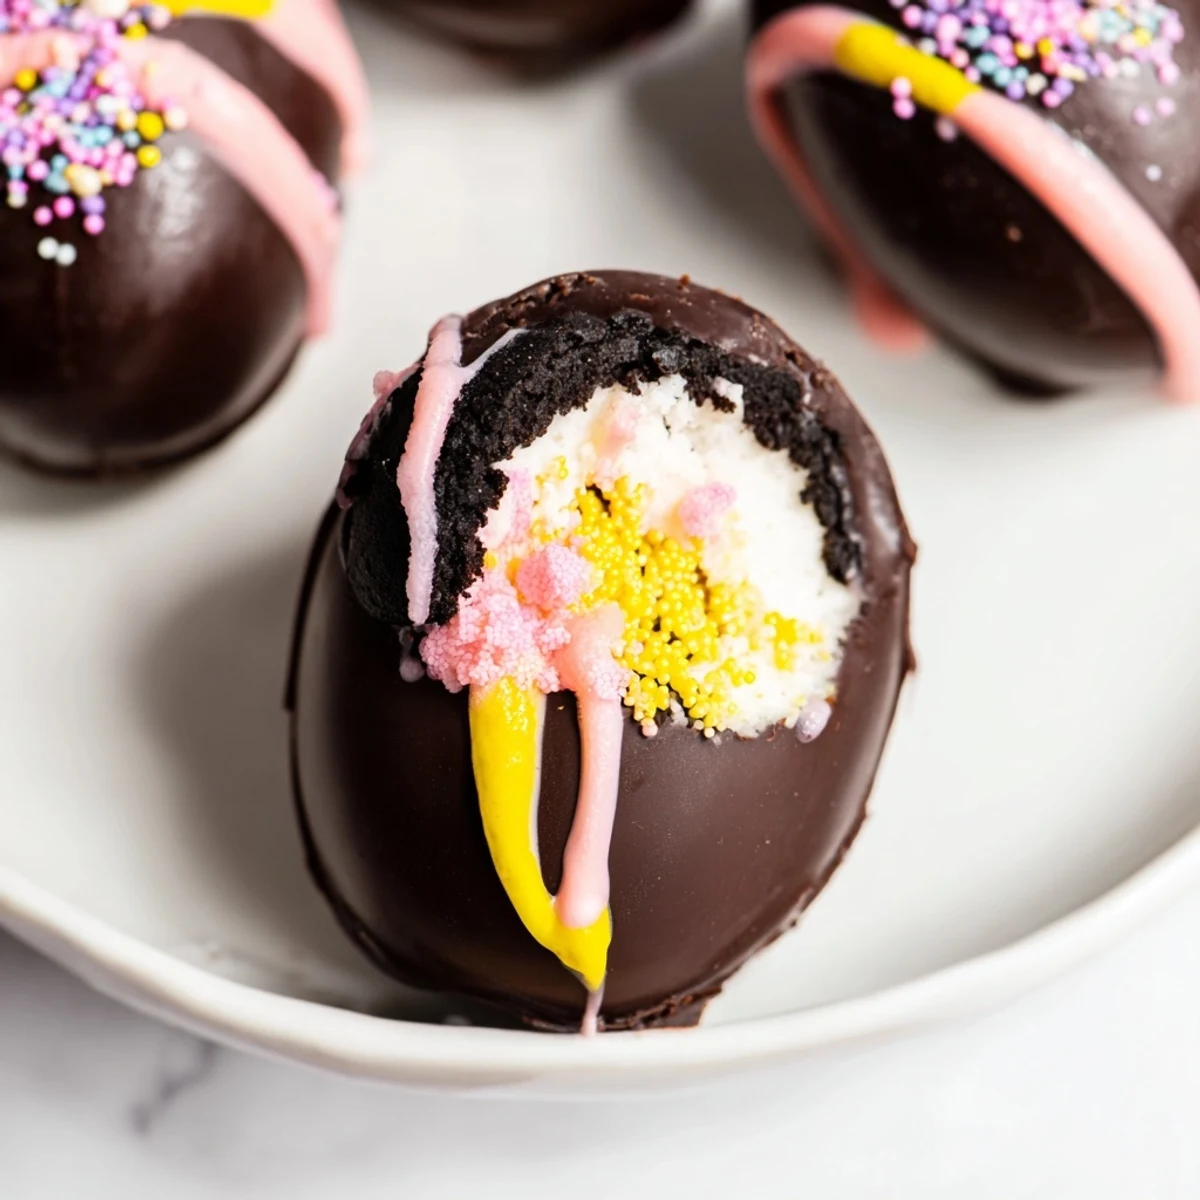
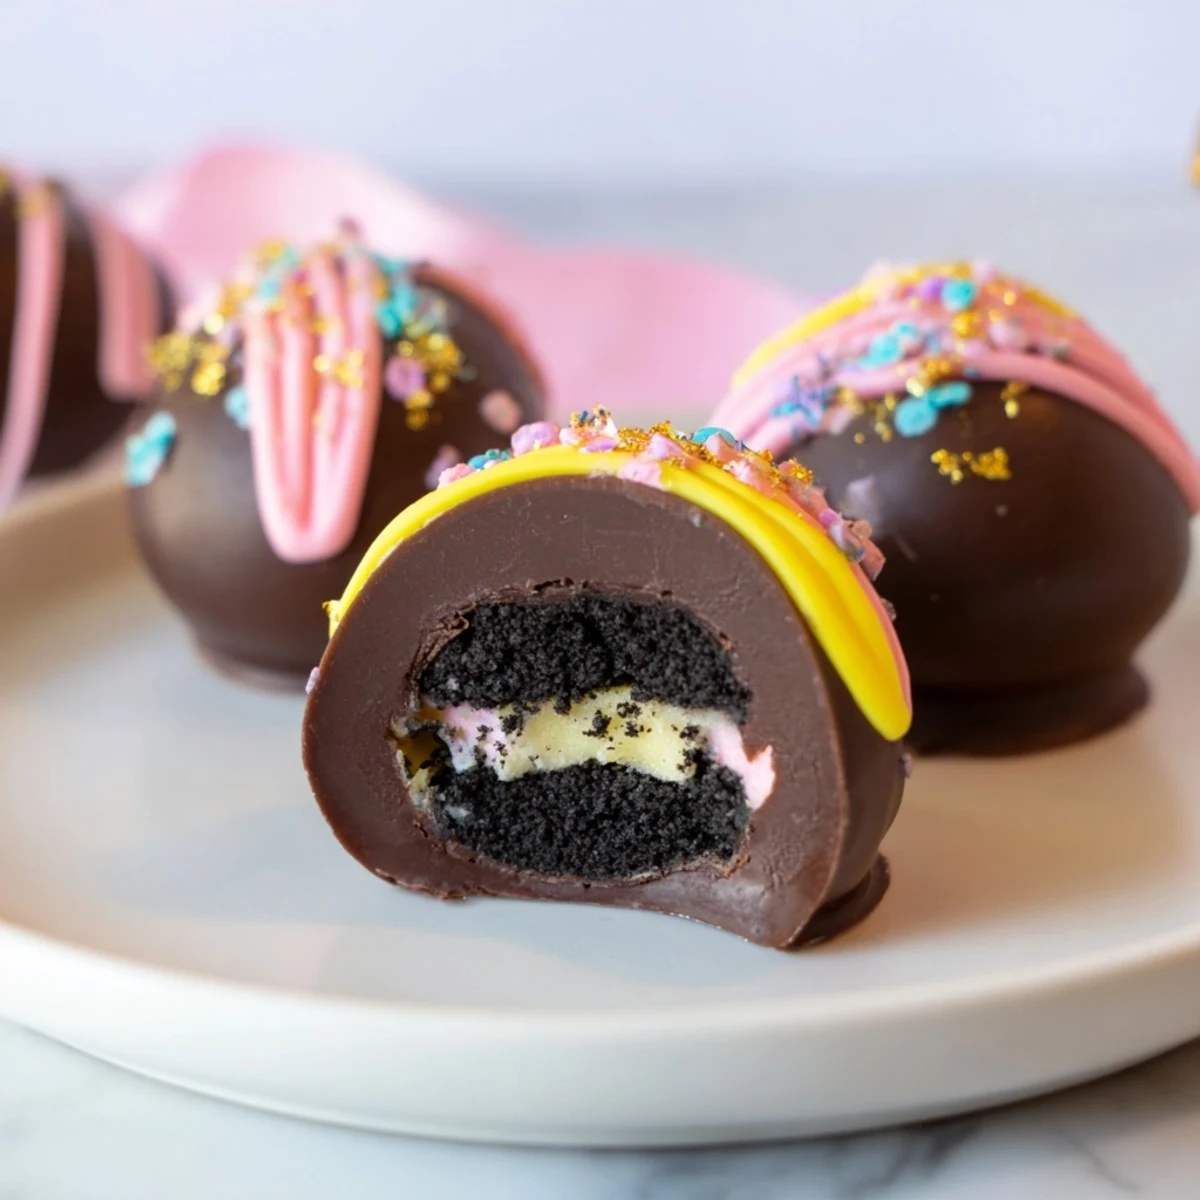
Save These delightful egg-shaped confections combine the classic flavors of chocolate sandwich cookies and rich cream cheese, all coated in smooth melted chocolate. The no-bake preparation makes them incredibly accessible for home cooks of any skill level.
Start by pulsing whole Oreos with their filling into fine crumbs, then blend with softened cream cheese until a thick, pliable dough forms. Shape the mixture into egg forms, chill until firm, then dip in melted semi-sweet or white chocolate. Decorate with colorful sprinkles, candy melts, or edible glitter for a festive touch that captures the spirit of spring.
The result is a creamy, chocolatey bite-sized dessert that's both visually appealing and irresistibly delicious. They store beautifully in the refrigerator for up to a week, making them excellent for advance preparation or gifting to friends and family during the holiday season.
My kitchen counter looked like a pastel explosion had gone off, and I could not have been happier about it. Pink and yellow sprinkles were everywhere, the chocolate was melting in imperfect pools, and my niece was already eating the rejects that did not look quite egg-like enough. These Oreo balls started as a last-minute Easter contribution and somehow turned into the one thing people actually remember from the holiday spread.
Last year I made three dozen of these for a church potluck and watched them disappear in under ten minutes. What really got me was the pastor reaching for seconds before even finishing his first one, chocolate still smeared on his upper lip. Sometimes the most unpretentious desserts are the ones that knock people off their feet.
Ingredients
- 36 Oreo cookies: One standard package works perfectly, and I have found that using the entire cookie including the filling gives the best texture and flavor
- 8 oz cream cheese: Must be softened to room temperature or you will end up with lumps that refuse to blend no matter how long you process
- 12 oz semi-sweet or white chocolate: Chopping bar chocolate melts more smoothly than chips, but chips work fine if that is what you have on hand
- Colored candy melts: Optional for drizzling, but they make such a festive difference for Easter that I rarely skip them anymore
- Sprinkles and edible glitter: The topping is where these become your own, so do not be shy with the decorations
Instructions
- Prep your workspace:
- Line a baking sheet with parchment paper before you start because once the chocolate is melted, you need to move fast.
- Crush the cookies:
- Pulse the entire Oreo cookies in a food processor until they resemble fine sand with no large chunks remaining.
- Make the dough:
- Add the softened cream cheese and blend until the mixture comes together into a thick, uniform dough that holds its shape when squeezed.
- Shape into eggs:
- Scoop tablespoon portions and gently roll them into egg shapes, placing each on the prepared baking sheet as you work.
- Chill thoroughly:
- Freeze the shaped eggs for at least 30 minutes because cold centers are the secret to clean chocolate coating.
- Melt the chocolate:
- Heat chocolate in a microwave-safe bowl in 20-second intervals, stirring between each, until completely smooth and glossy.
- Dip and coat:
- Use a fork to lower each chilled egg into the melted chocolate, lift it out, and tap gently to let excess drip off before returning to the sheet.
- Add decorations:
- While the chocolate is still wet, sprinkle with toppings or drizzle with colored candy melts for that festive Easter look.
- Set completely:
- Refrigerate for at least 15 minutes until the chocolate is firm and the centers are no longer soft to the touch.
 Save
Save My mom called me mid-assembly last Easter, panicked because her dough was too sticky to shape. Turns out she had used twice as many Oreos as the recipe called for, trying to be generous. We laughed about it over the phone while she added more cream cheese to salvage the batch, and honestly, they turned out just fine.
Making Them Ahead
I often shape the eggs a day before dipping and store them in the freezer between layers of parchment paper. This breaks up the work and keeps the centers extra cold for the chocolate coating. Just let them thaw slightly at room temperature before serving so the centers are not rock hard.
Coating Troubleshooting
If your chocolate seizes and turns grainy, do not panic. Add a teaspoon of coconut oil or vegetable shortening and stir gently until it smooths out again. This has saved more batches than I care to admit, especially on humid days when chocolate seems to have a mind of its own.
Serving and Storage
These keep beautifully in the refrigerator for up to a week, though they rarely last that long in my house. I layer them between wax paper in an airtight container to prevent sticking and maintain that pretty chocolate shine. Serve them chilled or let them sit out for fifteen minutes before guests arrive for the ideal texture.
- Package them in clear treat bags tied with pastel ribbon for effortless Easter gifts
- Set up a decorating station at your next gathering and let guests customize their own
- Make a double batch because these disappear faster than you would expect
 Save
Save There is something deeply satisfying about turning a simple package of sandwich cookies into something that looks like it came from a chocolatier. Watch your friends pretend not to be impressed right before they reach for a second one.
Recipe FAQs
- → Can I make these ahead of time?
-
These freeze beautifully for up to 3 months before coating. Once dipped and decorated, store in an airtight container in the refrigerator for up to 1 week. Bring to room temperature for 15 minutes before serving for the creamiest texture.
- → What type of chocolate works best for coating?
-
Semi-sweet chocolate chips or baking bars provide the classic flavor contrast. White chocolate creates a beautiful Easter egg look, especially when tinted with pastel food coloring. For best results, use high-quality chocolate designed for melting and dipping.
- → How do I get the perfect egg shape?
-
Use a tablespoon to portion the dough evenly. Roll between slightly greased palms, then gently elongate one end to form the egg shape. If the mixture becomes too warm or sticky, chill for 10-15 minutes before continuing to shape.
- → Can I use different cookie varieties?
-
Golden Oreos create a vanilla-filled center that pairs beautifully with white or milk chocolate. Mint or peanut butter Oreos add delicious flavor variations. Just keep the cream cheese ratio the same for proper texture.
- → Why do my coated balls look streaky or dull?
-
This usually happens when moisture gets into the chocolate or if the chilled centers cause the chocolate to seize. Ensure your centers are thoroughly frozen before dipping, and work in a cool, dry environment. Adding a teaspoon of coconut oil to the melted chocolate helps create a glossy finish.
- → What's the best way to decorate these for Easter?
-
Use pastel-colored candy melts to create drizzle designs, or sprinkle edible glitter and colored sugar immediately after dipping while the chocolate is still wet. You can also place small edible flowers or press sprinkles in patterns to mimic decorated eggs.