Save
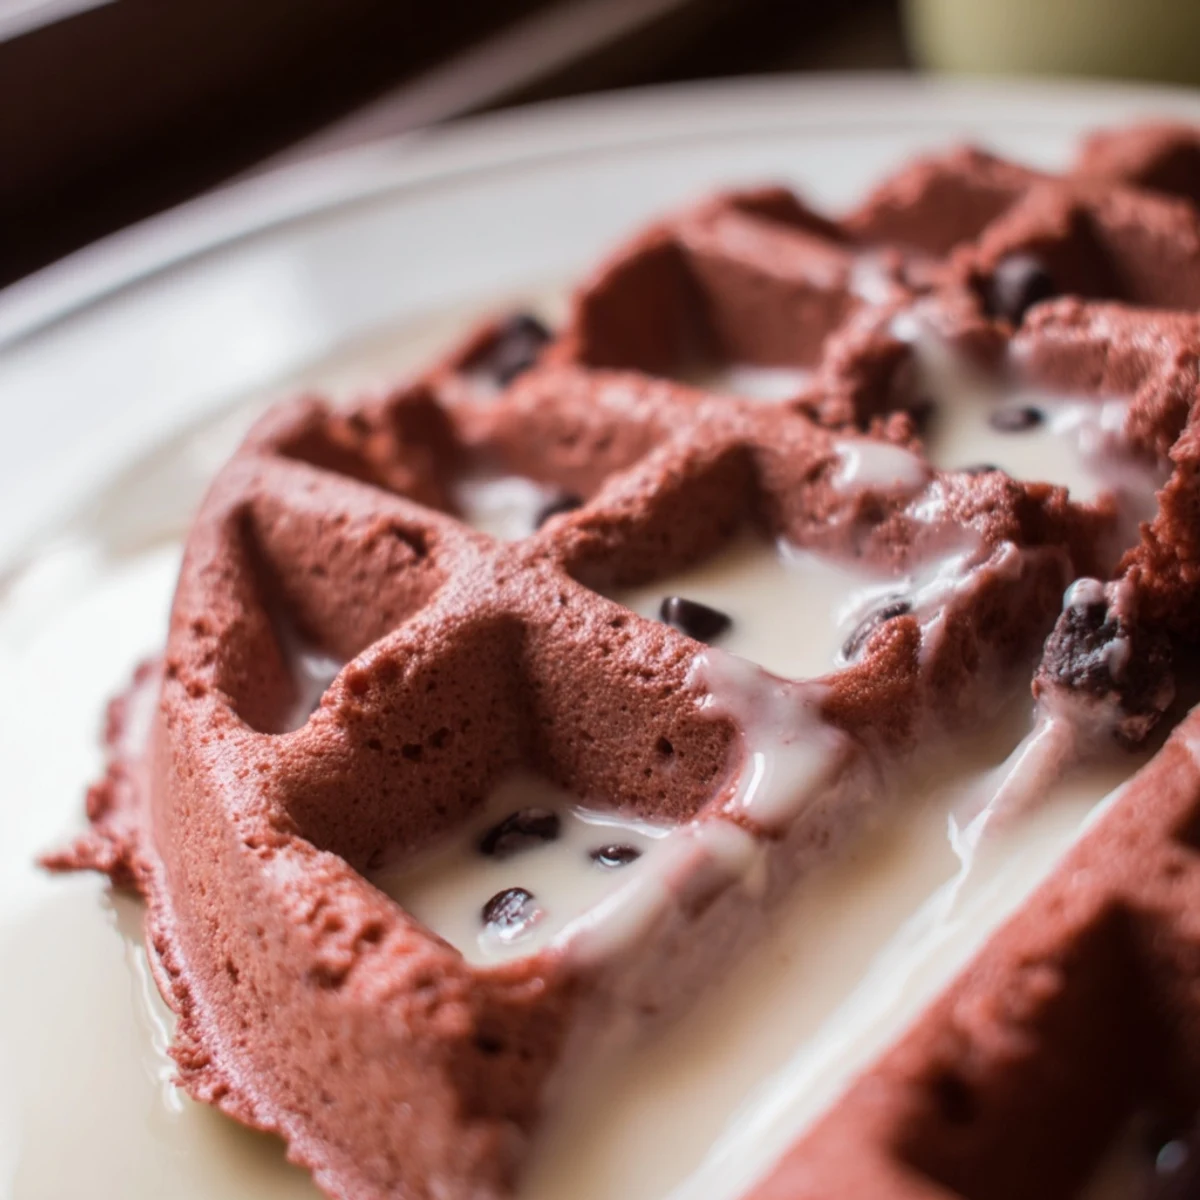
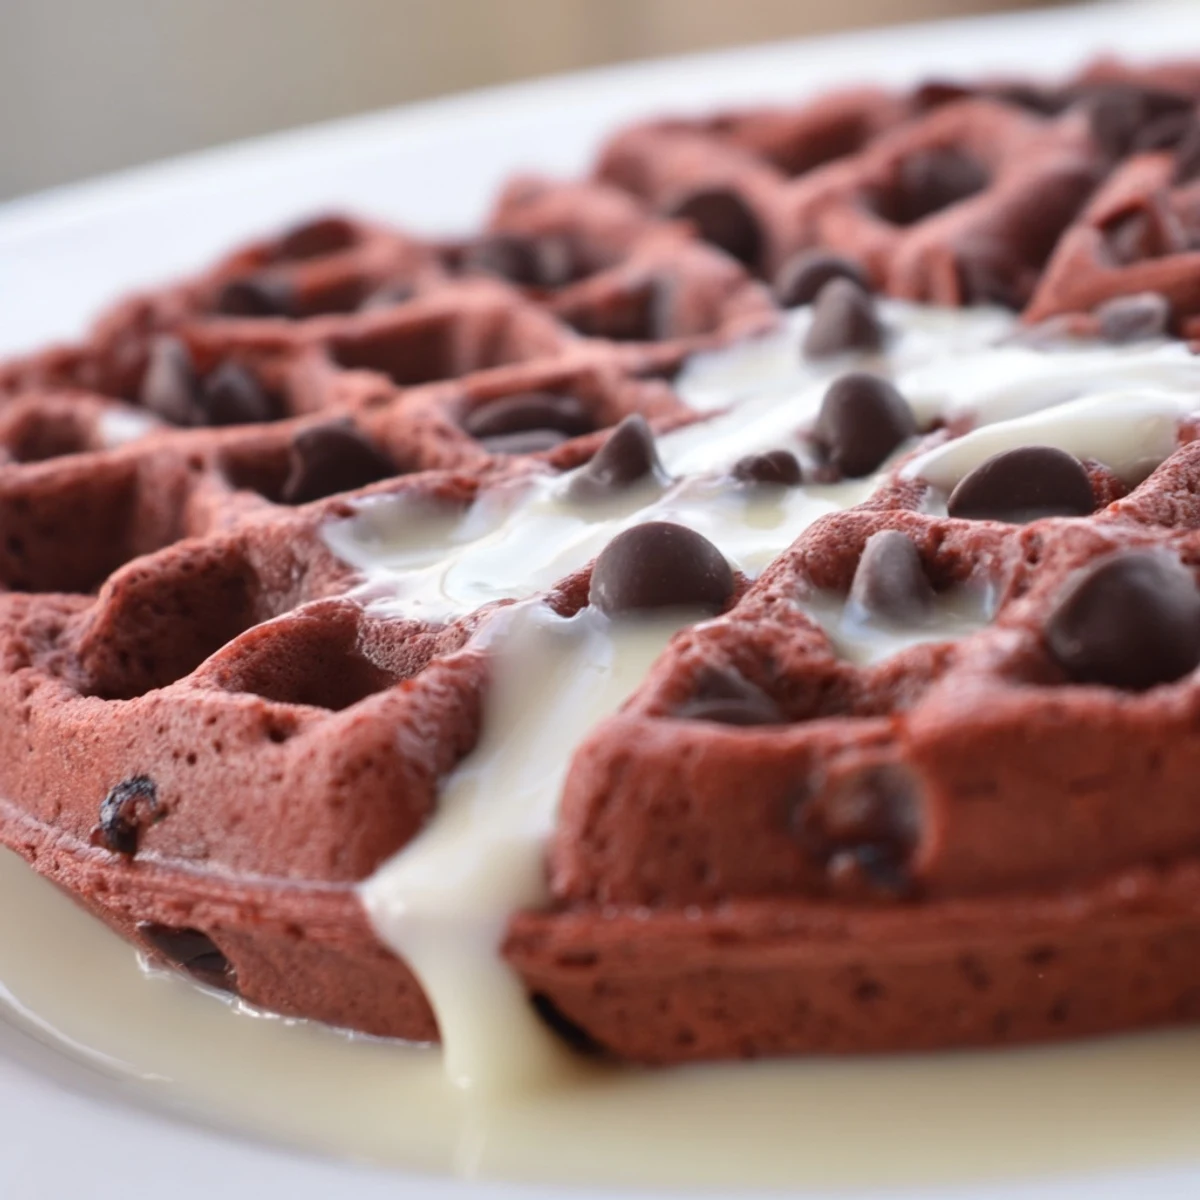
Save Enjoy the rich, fluffy goodness of red velvet waffles, a vibrant breakfast or brunch treat. These waffles feature a chocolatey, vanilla-infused batter, cooked until crisp.
The real star is the accompanying cream cheese syrup: a decadent, tangy-sweet concoction of softened cream cheese, butter, powdered sugar, and vanilla. Preparation is straightforward, combining dry and wet ingredients for the waffles, then cooking them in a waffle iron. The syrup comes together quickly by beating its components until smooth. Serve warm, generously adorned with the luscious syrup, for a truly special meal.
I still remember the first time I decided to make red velvet waffles for a Saturday morning. My partner, usually a creature of habit with his plain toast, was skeptical, but the sheer vibrancy of the batter bubbling in the bowl, a deep crimson promising something special, was just too much fun to resist. The thought of pairing that delicate chocolate flavor with a tangy cream cheese syrup felt like a little indulgence, a culinary secret I was about to unlock. It turned out to be the perfect antidote to a dreary, grey morning, bringing a burst of color and cheer right to our breakfast table.
One particular winter morning, the snow was falling thick and fast outside, and we had plans to build a snowman that got thwarted by the sheer volume of flakes. Instead of being glum, I whipped up a double batch of these waffles. The warmth from the waffle iron, the sweet scent of cocoa and vanilla filling the kitchen, and the cheerful red of the batter felt like a defiant splash of color against the white landscape. We ended up having an indoor “snow day picnic” on the living room floor, cozy under blankets, with these bright, fluffy treats making everything feel joyful.
Ingredients
- All-Purpose Flour: This is our structural foundation; don’t overmix it, or your waffles will be tough.
- Unsweetened Cocoa Powder: It’s the “velvet” in red velvet, providing that subtle chocolate depth that’s crucial.
- Granulated Sugar: Just enough sweetness to balance the cocoa and buttermilk without being cloying.
- Baking Powder & Baking Soda: These are our leavening agents, working together to create that irresistible fluffiness and rise.
- Salt: A little pinch enhances all the other flavors, so don’t skip it.
- Large Eggs: They bind everything together and contribute to a rich, tender crumb.
- Buttermilk: The essential tangy component that reacts with the baking soda and keeps the waffles wonderfully moist. If you don’t have it, a quick DIY version works surprisingly well!
- Unsalted Butter, melted: Adds richness and helps achieve those crispy edges we all love.
- Vanilla Extract: A classic flavor enhancer that harmonizes beautifully with chocolate and cream cheese.
- Red Food Coloring: This is where the “red” comes in; a good quality gel coloring gives the best vibrant results.
- Mini Chocolate Chips (optional): A delightful textural surprise and extra chocolatey goodness, especially when they melt slightly within the waffle.
- Cream Cheese, softened: The star of our syrup, make sure it’s properly softened for a lump-free, silky smooth result.
- Unsalted Butter, softened: Adds body and richness to the syrup, balancing the cream cheese’s tang.
- Powdered Sugar: Sweetens the syrup and gives it that smooth, pourable consistency.
- Milk: Adjusts the syrup’s thickness; start with the recommended amount and add more slowly.
- Vanilla Extract (for syrup): A touch of warmth and sweetness for the syrup.
- Pinch of Salt (for syrup): Just like in the waffles, it brightens all the flavors.
Instructions
- Get Your Waffle Iron Ready:
- Preheat your waffle iron; you want it nice and hot so the batter starts cooking immediately and gets those perfect crispy edges.
- Whisk the Dry Magic:
- In a big bowl, whisk together the flour, cocoa powder, sugar, baking powder, baking soda, and salt. Make sure there are no lumps; this ensures even distribution of all those leavening agents.
- Combine the Wet Wonders:
- In a separate bowl, whisk together the eggs, buttermilk, melted butter, vanilla extract, and that vibrant red food coloring until everything is beautifully combined and uniform in color.
- Gently Bring Them Together:
- Pour the wet ingredients into the dry, mixing just until combined. A few small lumps are okay overmixing is the enemy of tender waffles! If you're adding chocolate chips, fold them in now.
- Cook Until Golden & Crisp:
- Lightly grease your hot waffle iron. Spoon about 1/2 to 3/4 cup of batter (depending on your iron’s size) onto the center and cook until the steam subsides and the waffles are golden, crisp, and cooked through, typically 4-5 minutes. Repeat with the rest of your batter.
- Whip Up the Cream Cheese Syrup:
- While the waffles cook, grab a medium bowl and beat the softened cream cheese and butter until they’re wonderfully smooth and airy. Then, add the powdered sugar, milk, vanilla, and a tiny pinch of salt, whisking until it transforms into a pourable, luscious syrup. You can add a bit more milk if you prefer a thinner consistency.
- Serve & Enjoy:
- Plate your warm, fluffy red velvet waffles and drizzle them generously with that amazing cream cheese syrup. These are best enjoyed immediately!
 Save
Save There’s something incredibly satisfying about setting out a platter of these vibrant waffles, especially when the light catches their deep red hue. It always feels a bit like magic, watching faces light up, particularly kids, who are just delighted by the color. Beyond just eating, it creates a moment of shared joy, a little celebration right at the breakfast table that encourages lingering and conversation.
The Art of the Perfect Waffle
Achieving that ideal balance of crispy exterior and fluffy interior isn’t just about the recipe; it’s also about technique. Giving your waffle iron ample time to preheat is paramount. You want to hear that satisfying sizzle when the batter hits the griddle. Don’t be tempted to peek too early either; let the steam do its work, and resist opening the iron until it’s stopped actively steaming, which usually indicates the waffle is nearly done.
Mastering Your Syrup Consistency
The cream cheese syrup is a game-changer, and its consistency is key to its appeal. If it’s too thick, it won’t drizzle nicely; too thin, and it’ll just soak right in. Start with the suggested amount of milk, but then pay attention to how it looks and feels as you whisk. If it’s a bit stiff, add just a teaspoon of milk at a time, whisking well after each addition, until it cascades beautifully off your spoon.
Little Touches, Big Impact
While these waffles are spectacular on their own, a few small additions can elevate the experience even further.
- A sprinkle of fresh raspberries or blueberries adds a lovely tart counterpoint to the sweetness.
- Dusting with a little extra cocoa powder or powdered sugar before serving makes them look incredibly professional.
- For an extra touch of warmth, a tiny dash of cinnamon in the syrup can be a delightful surprise.
 Save
Save These Red Velvet Waffles with Cream Cheese Syrup are truly a treat for the senses, perfect for making any morning feel like a special occasion. I hope they bring as much joy and deliciousness to your table as they have to mine!
Recipe FAQs
- → Can I prepare the waffle batter in advance?
-
Yes, you can prepare the dry and wet ingredients separately and combine them just before cooking. If you mix the full batter ahead, the leavening agents might lose some potency, resulting in less fluffy waffles. However, a few hours in the fridge is generally fine.
- → What can I use if I don't have buttermilk?
-
You can easily make a buttermilk substitute. For 1 3/4 cups of buttermilk, simply measure out 1 3/4 cups of regular milk and stir in 1 tablespoon of lemon juice or white vinegar. Let it sit for 5-10 minutes until it slightly curdles before using.
- → How should I store leftover cream cheese syrup?
-
Store any unused cream cheese syrup in an airtight container in the refrigerator. It should stay fresh for up to 5-7 days. Reheat gently in the microwave or a small saucepan over low heat, stirring frequently, until pourable again. You might need to add a splash more milk to adjust consistency.
- → Can these waffles be frozen?
-
Absolutely! Cooked waffles freeze wonderfully. Allow them to cool completely, then place them in a single layer on a baking sheet to freeze for about 30 minutes. Once firm, transfer them to a freezer-safe bag or container. They can be stored for up to 2-3 months. Reheat in a toaster, toaster oven, or conventional oven until crisp.
- → What are some good toppings besides the cream cheese syrup?
-
While the cream cheese syrup is divine, you can also top these waffles with fresh berries (strawberries, raspberries), a dusting of cocoa powder or powdered sugar, whipped cream, or even a drizzle of chocolate sauce for extra indulgence.