 Save
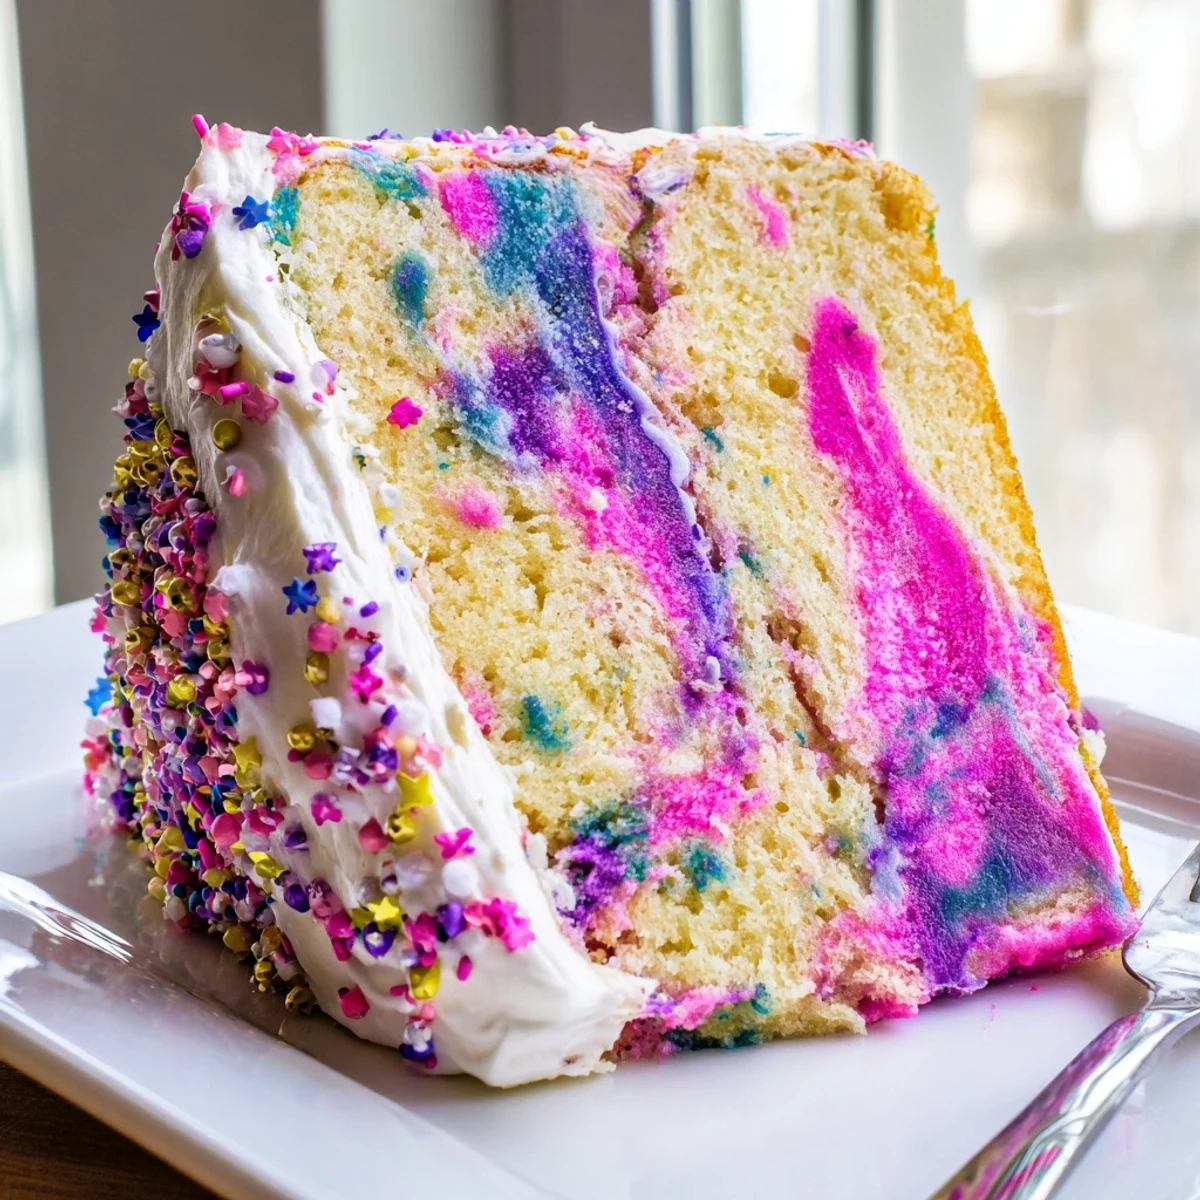
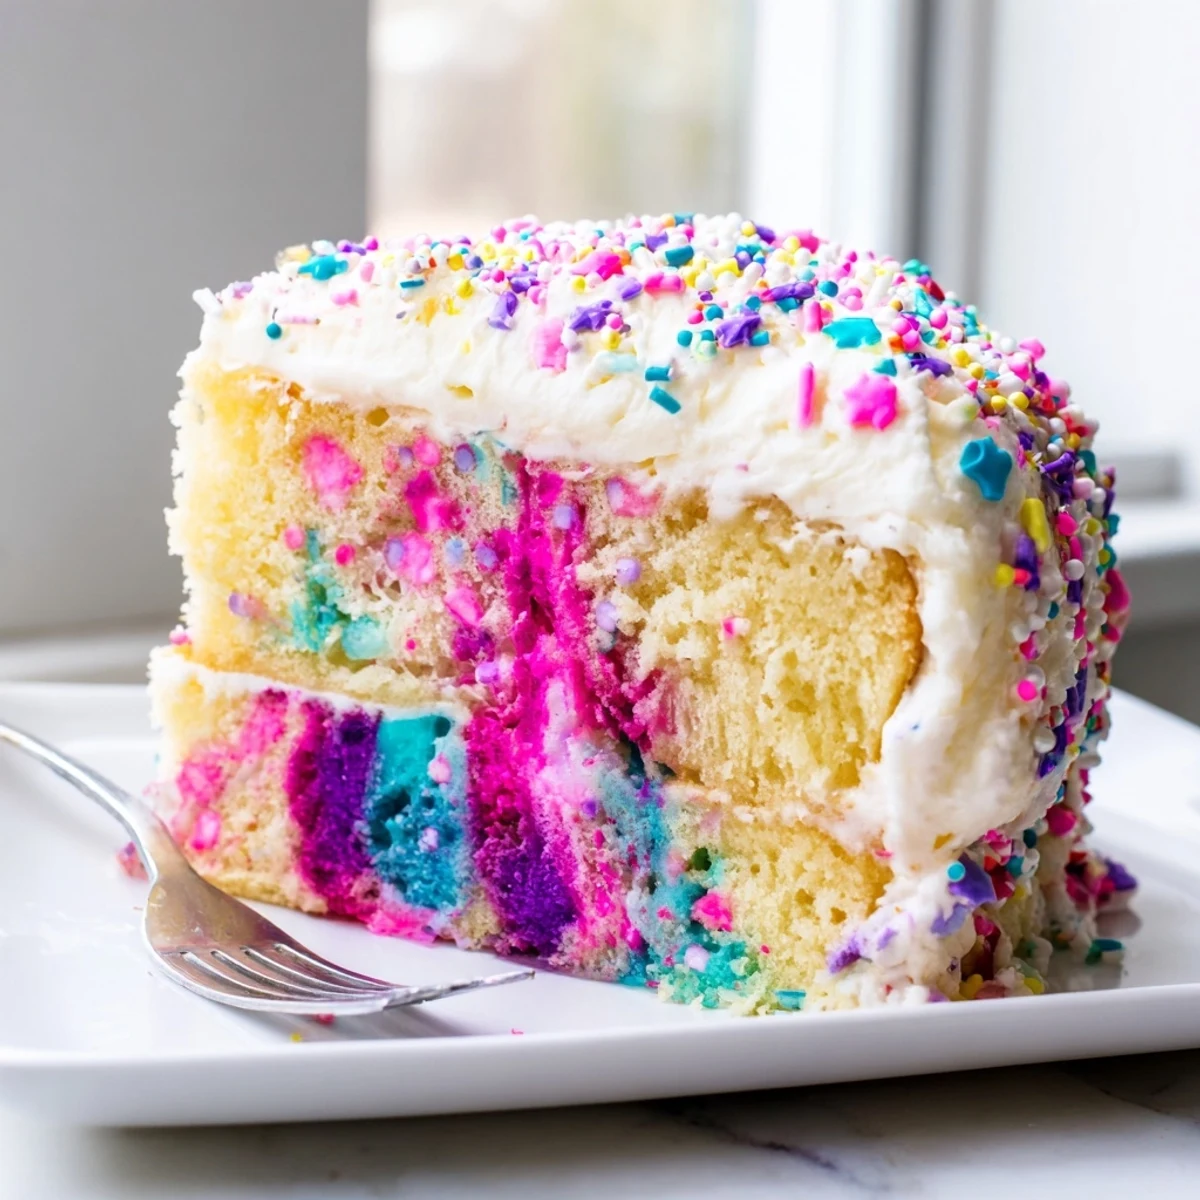
Save This whimsical unicorn poke cake combines moist funfetti cake with four vibrant colors of vanilla pudding poked throughout. The result is a stunning rainbow surprise inside every slice. Topped with fluffy whipped cream and colorful sprinkles, this showstopping dessert brings magic to any celebration. Perfect for birthdays, parties, or whenever you want to add enchantment to your table.
The first time I brought this cake to my niece's birthday party, I actually felt nervous about how over-the-top it looked. I mean, we're talking about a dessert that's essentially screaming for attention with its rainbow pockets of pudding and clouds of whipped cream on top. But when I cut that first slice and revealed those colorful pudding-filled holes, every single child at the party went completely quiet, then erupted in actual wonder. That moment of pure joy made me realize sometimes food should be fun, no matter how old you are.
I made this again last month for a coworker's farewell celebration, and honestly, I think the adults were even more excited about the rainbow insides than the kids usually are. Someone actually asked if I'd studied pastry arts, which made me laugh because the entire process involved a boxed cake mix and instant pudding. It's funny how a little food coloring and some strategic hole-poking can transform something so basic into something people remember months later.
Ingredients
- Funfetti or vanilla cake mix: The boxed version works perfectly here because we're focusing our energy on the colorful pudding surprise inside, and nobody will be able to tell the difference once all those magical layers come together
- Required cake mix ingredients: Typically eggs, oil, and water, but check your specific box because different brands have slightly different requirements and you want to get the cake base exactly right
- Instant vanilla pudding mix: Two packages give you enough filling to create those vibrant rainbow pockets throughout the entire cake, and the instant variety sets up perfectly in the fridge without any cooking
- Cold milk: Four cups might seem like a lot, but this pudding mixture needs to be pourable enough to seep into all those holes you'll be making in the warm cake
- Gel food coloring: Pink, purple, blue, and yellow will give you that classic rainbow look, and gel coloring produces those incredibly vibrant shades that make the whole thing feel magical
- Whipped topping: One tub creates that perfect cloud-like layer on top, and make sure to thaw it completely so you can spread it without tearing the cake surface
- Unicorn or colorful sprinkles: This is mandatory because we're making unicorn food, and no unicorn cake is complete without an extra layer of sparkle on top
Instructions
- Preheat your oven and prepare the pan:
- Set your oven to 350°F and grab a 9x13-inch baking dish, giving it a thorough coating of non-stick spray so nothing sticks later.
- Mix and bake the cake:
- Prepare the cake batter exactly according to the package instructions, pour it into your prepared pan, and bake for about 25 to 30 minutes until a toothpick inserted in the center comes out clean.
- Let the cake cool briefly:
- Remove the cake from the oven but let it hang out in the pan for about 10 minutes, and don't try to poke holes in a piping hot cake or you'll end up with a soggy mess instead of perfect pudding pockets.
- Create the pudding channels:
- Take the handle end of a wooden spoon and poke holes every 1 to 2 inches all across the surface of the warm cake, pressing down until you feel the spoon hit the bottom of the pan.
- Prepare the pudding base:
- Whisk together both packages of instant vanilla pudding mix with all four cups of cold milk in a large bowl, and keep whisking for about 2 minutes until the mixture starts to thicken slightly.
- Divide and color the pudding:
- Split the pudding mixture evenly among four separate bowls, then add a different gel food coloring to each bowl and mix until you've got four vibrant, intensely colored puddings ready to go.
- Fill the rainbow holes:
- Spoon the colored puddings randomly into all those holes you made, and don't worry about being too neat here because the chaotic rainbow effect is exactly what you're going for.
- Add the cloud layer:
- Spread the thawed whipped topping evenly over the entire surface of the cake, creating a smooth white blanket that hides all the colorful magic underneath.
- Sprinkle the magic:
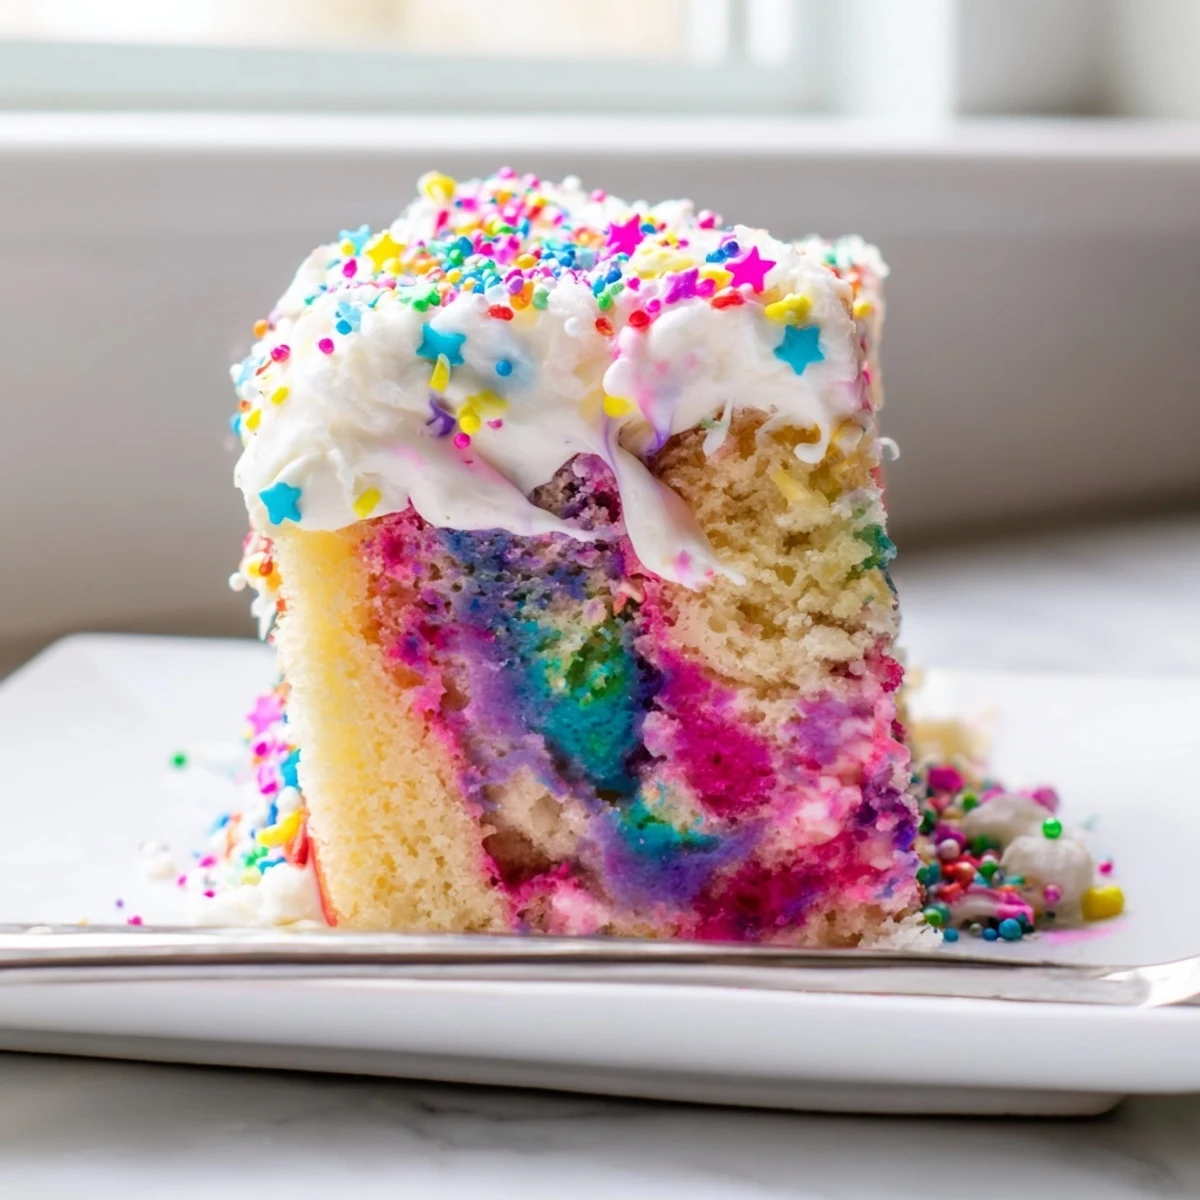
- Shower the top of the cake with your unicorn or colorful sprinkles while the whipped topping is still soft so they adhere perfectly and don't slide off later.
- Chill before serving:
- Pop the whole thing in the refrigerator for at least an hour so the pudding sets completely in those holes, making each slice hold its beautiful rainbow pattern when you cut it.
 Save
Save This cake has become my go-to for those moments when someone needs a pick-me-up but I don't have time for anything elaborate. Last week, my friend was going through a rough patch, so I showed up at her door with this rainbow creation, and watching her face light up when I explained there was a surprise inside reminded me why I bother with food coloring in the first place. Sometimes we all need a little extra color in our lives.
Making It Your Own
While the classic rainbow version is stunning, I've made this with just pink and red for Valentine's Day, and orange and black for Halloween, and honestly, the two-color version is just as impressive. You can also swap the funfetti for chocolate cake mix if you want a more sophisticated flavor profile that still has that playful surprise element inside. The technique stays exactly the same regardless of your color choices, so feel free to match this to whatever celebration or mood you're working with.
The Secret To Perfect Pudding Pockets
After making this cake probably a dozen times now, I've learned that the size of your holes matters more than you might think. If you make them too small, the pudding won't penetrate deeply enough to create those defined colorful stripes when you slice into the cake. I aim for holes about the width of my wooden spoon handle, pressing firmly but not violently through the warm cake, and I've found that spacing them about an inch apart gives the best distribution of colors without compromising the structural integrity of each slice.
Make Ahead Magic
This cake actually tastes better after it's had some time to sit in the refrigerator, because the pudding permeates the surrounding cake and creates this incredibly moist, almost creamy texture throughout. I've made it the night before a party multiple times, and it holds up beautifully as long as you keep it covered, though I will say the sprinkles might start bleeding color slightly after 24 hours. If you're prepping way ahead, consider adding the sprinkles right before serving for the freshest appearance.
- Use a serrated knife when slicing and wipe it clean between cuts for the prettiest rainbow cross-sections
- If you're transporting this cake, keep it completely flat and level in your car or the whipped topping might slide
- This dessert needs to stay refrigerated until serving time because of all that dairy, especially if it's warm outside
 Save
Save There's something genuinely delightful about cutting into an ordinary-looking cake and revealing that hidden rainbow inside, and I think that's exactly why this dessert resonates so much with people. Hope you enjoy making this as much as I do, and remember, life's too short for boring desserts.
Recipe FAQs
- → What makes this cake unicorn-themed?
-
The magical rainbow effect comes from coloring vanilla pudding in vibrant pink, purple, blue, and yellow shades, then pouring them into holes poked throughout the cake. When sliced, the colorful pudding creates a stunning unicorn-inspired surprise inside.
- → How far in advance can I make this cake?
-
This cake requires at least 1 hour of chilling time for the pudding to set properly. You can make it up to 24 hours in advance—store it covered in the refrigerator. The flavors actually develop better overnight, making it perfect for party planning.
- → Can I use homemade cake instead of box mix?
-
Absolutely! While the box mix offers convenience and reliable results, you can substitute your favorite homemade vanilla or funfetti cake recipe. Just ensure it bakes in a 9x13-inch pan and has similar moisture content to absorb the pudding properly.
- → What's the best way to achieve vibrant pudding colors?
-
Use gel food coloring rather than liquid drops for the most intense colors. Start with a small amount and add more gradually—gel colors are highly concentrated. Mix thoroughly until you reach your desired brightness before pouring into the cake.
- → Can I make this dairy-free?
-
Yes! Use plant-based milk alternatives like almond, oat, or coconut milk with the instant pudding mix (note that some brands set better than others). Swap the whipped topping for a dairy-free whipped cream alternative and check that your sprinkles are vegan-friendly.
- → Why is my pudding not setting in the cake?
-
The pudding needs to be whisked with cold milk for about 2 minutes until slightly thickened before adding colors. Also ensure you're using instant pudding mix, not cook-and-serve. The chilling time in the refrigerator is crucial for proper setting.